
| Previous Top Next |
| Modifying the Model |
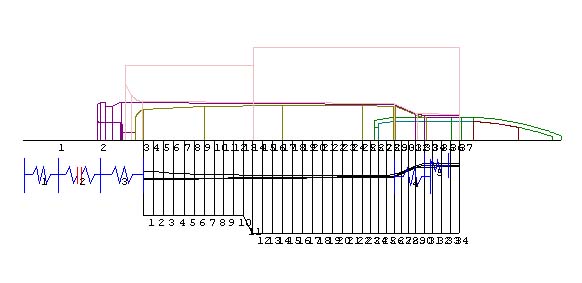
The model as generated by CASAS can be modified by simply editing the data in the Model Results table. For example, the position of a node can be changed by double clicking on the value in the Axial Location column and then entering a new value. Nodes can also be added to the model. To demonstrate this feature, let's recall the model we generated in the section called "Model Generation With User Specified Mode".

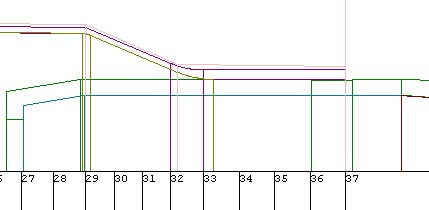
This cartridge case has a radius between the taper and the neck. With the relatively course mesh used in this example, the CASAS model generator didn't place a node in the middle of this radius. This would be the best location for the transition between Zone 3 and 4 and also the best place to attach the last spring. This area is shown in detail in the following image.

Let's add a node half way between nodes 32 and 33. The mid-point between these two nodes is easily calculated from the data in the Model Results table to be 1.919 inch. To add a node at this point, first open the Model Results screen by clicking on the appropriate tab. Then double click in the last cell (blank) of the axial location column and enter the value 1.919 as shown below.

Now "Re-generate" the model to see the results of the changes. In order to save user inputs you must use the "Re-generate" option which is accessed from the list box as shown below

The new model is shown below with the added node in just the right place. The CASAS modeler automatically calculated all required data elements for this node, re-numbered all the nodes and moved the attachment point of the last spring to the new node.

| © 2002 Arrow Tech Associates |